


Getting started
Choosing the best chargers for your system and setting them up correctly will help you get the best performance from your batteries and can also extend their useful life.
We've designed our batteries to be as forgiving and 'drop-in' as possible. Thanks to the built in Active Balancing, BMS voltage protection and Emergency Mode functions, the new SMART4 range of batteries can be used with almost any lithium or lead-acid charger. Every charger is different however and there are lots of variables to consider before charging your battery for the first time. This guide has been created to help you with the basics, if you need help with a specific charger model then please check out Roamer Knowledge Hub or contact the Roamer Tech Support Team below.


Understanding charge profiles
Most modern multi-stage chargers have bulk, absorption and float stages that can be configured via a Bluetooth app or selector switch. Some brands use different terminology but the functions are the same. They will charge at constant current (bulk) until the battery reaches the target voltage, then hold at this voltage for a set time period (absorption) before finally settling at a maintenance (float) voltage that keeps the battery full.
The Active Balancer in your Roamer battery means that absorption and float stages are not technically required. The ideal charge profile for Roamer batteries therefore involves charging up to 14.4V (if its a 12V battery) and then stopping. It's that simple, the BMS will handle the rest. A short absorption period won't do any harm however and can ensure the battery is charged to its maximum capacity. The below guide will help you configure the ideal charger settings, values provided are for 12V batteries but you can simply multiply by two (or four) for 24V and 48V battery banks.
Recommended charge settings
For 12V batteries only
Set this to 14.4V for the most efficient charging but anything from 13.8V to 14.6V is acceptable. Usually the default 'lithium profile' on your chargers will be ok to use but if you are able to enter a custom user profile then we recommend you change this to 14.4V.
If you are charging to 14.4V then an absorption time of 0 to 30 minutes is enough to fully charge the battery but choose the shortest period available with your charger. A lower voltage may require a longer absorption period, up to a maximum of 2 hours.
Float charge should be turned off if possible. If not, you can use a float voltage of 13.5V. Anything between 13.3V to 13.8V is acceptable but try to avoid holding the battery at higher voltages for prolonged periods as this can shorten the life of your battery.
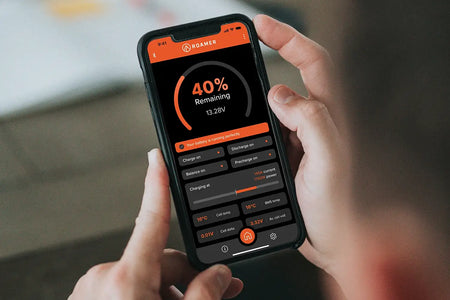
If your charger has a programmable storage voltage, set this to 13.2V. This will maintain the battery during long storage periods where it is not possible to isolate the battery, while ensuring that the battery voltage is not held artificially high for extended periods.
These are lead-acid only stages and are not required with LiFePO4 batteries. Where this is given as an option, you should set this to 'off' or if that's not possible, set the equalisation voltage to match the absorption voltage and the equalisation time to zero.
This is another lead-acid only function that is not required with LiFePO4 batteries. You should disable temperature compensation by turning it off in the charger app or dip switch settings, and/or removing the temperature sensor cable.

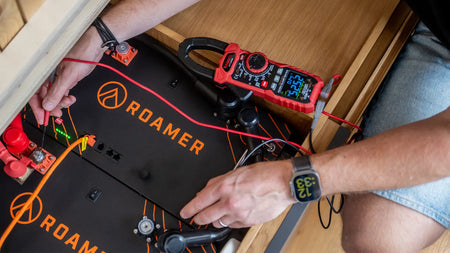
Alternator charging
Roamer batteries are perfectly happy being charged directly from an alternator or via a split charge / voltage sensitive relay. Active Balancing ensures that cells stay balanced even when charged to higher voltages and the high power BMS allows the battery to be charged at very high amps.
There are a lot of different factors involved with charging from an alternator however. Alternator rating, alternator type, alternator regulation method, battery size, state of charge, cable thickness and even the fuse rating can all have an effect on the charge current delivered and if you're not careful, there is a risk of the alternator overheating and getting damaged. The simplest and most reliable option is normally to use a DCDC charger (also called a Battery to Battery charger) which regulates charge current and voltage.
If you prefer to use your existing split charge relay, fit a hybrid lead-lithium system or use a regulated alternator to charge your battery bank directly, please get in touch with Roamer and we can support you with this.
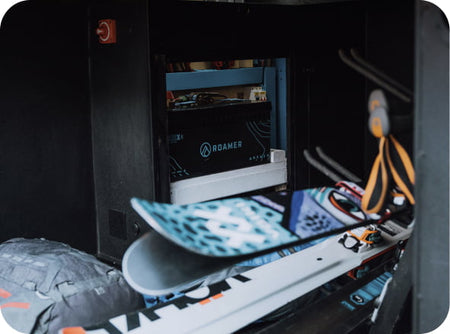
Low temperature charging
With multiple ski seasons and three Nordic winters under our belt, it's fair to say the Roamer team knows a thing or two about winter camping, and maintaining batteries in the cold. The simple truth is that if your battery is installed correctly then it is extremely rare to see internal battery temperatures below 0°C, even when camping in the harshest of winters.
Firstly, there are no problems discharging your batteries at very low temperatures, even down to minus 20°C. You will see a temporary reduction in useable capacity at these temperatures but nowhere near as much as you would with a lead acid battery. Reducing charging amps according to temperature can help extend the life of your battery however. Please see the user manual for a table of recommended charging amps. For complete protection, Roamer include a low temperature charge protection on the BMS as standard which blocks charging when it's below freezing.
If you need to warm the battery up to allow it to charge then you should gently heat the air around the battery and allow the temperature to steadily come back up. We do NOT recommend applying an external source of heat directly to the cells or the battery casing. If you intend to regularly use your battery in sub-zero temperatures then have a look at the XTREME range which can be fast charged down to minus 30 degrees without using a heater.


Tips for charging
Here's a few extra nuggets of charging wisdom to help you get the most from your battery:


KNOWLEDGE BASE
Search our comprehensive Knowledge Base
We have a wide range of articles to support you with your battery install. Our articles provide information on battery installation, maintenance and aftercare.


Still need help?
If you can’t find the information you need, contact us via phone, chat or email.
REQUEST TECH SUPPORT CALLBACK