


Safety first
Whether you're an absolute beginner or a seasoned pro, it's important to follow best practise principles for a safe lithium battery installation.
We've created this guide to help you choose the correct location, connect to chargers and inverters, and install appropriate fuses. We have focused on general concepts that apply to a typical off-grid installation such as a campervan or motorhome but there may be additional requirements for marine or domestic installations. For more detailed guidance please check out the Roamer Knowledge Base
If you're still unsure then please seek professional guidance before attempting to install your battery.
Quick start installation guide
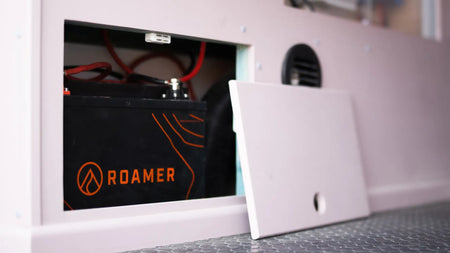
Your battery should be installed in a vented location that is not exposed to extreme temperatures, moisture or vibration and fastened securely. Battery terminals should be accessible but protected from accidental short circuits.
We strongly recommend fitting a battery isolator switch in your system. This allows you to quickly disconnect the battery in an emergency and also allows you to completely isolate the battery when in storage.
LiFePO4 batteries are capable of very high short-circuit currents in excess of 3000A so an appropriate fuse is required. There are various options available, the most commonly used are MRBF and Class-T.
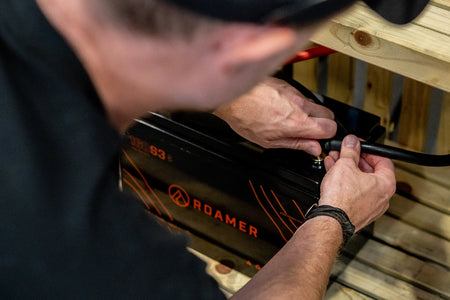
Our batteries use either M8 or M10 bolts. Cables should therefore be terminated with copper tube ring terminals, we do not recommend battery post adaptors. Bolts should be tightened with a torque wrench to 16Nm.
Secure your battery
Choose a location for your battery which does not expose the battery to extreme temperatures, moisture or vibration. Make sure the battery is securely fastened down so that it cannot move, even in the event of a motor accident. Pay attention to cable routes from the battery and ensure battery terminals are covered to protect against accidental short circuits.
Your Roamer battery can be installed upright or on its side. If installing on its side, the case lid will cause it to sit at an angle. You should therefore fit an additional bracket or spacer to bring the battery into a 90° angle from upright. Your Roamer battery must not be installed upside down.
We do not recommend heating the cells or battery directly as this can lead to uneven heating and long term damage to the cells. This is why we do not fit internal heaters. Best practise is to fit in the heated living space of the vehicle and install with an air gap underneath to allow heat to circulate freely. Avoid fitting directly onto a metal floor or hull due to the effect of cold bridging from the outside of the vehicle.


Fit an isolator switch
An isolator switch is an essential part of a DC electrical system as it allows for the complete isolation of the battery in the event of an emergency and also for disconnection during short term maintenance. The on/off switch on the SMART4 battery range is a handy way to switch your battery but this is not designed to be a replacement for a proper isolation switch.
We recommend isolating your battery and solar while in storage so if you are using solar and your MPPT charger or hybrid inverter does not have a physical isolation switch built in, you should also fit a solar PV isolation switch (or double pole DC breaker).
Normally you would install one switch for the entire battery bank but in some instances it may be appropriate to fit one per battery. Make sure you choose a quality switch from a reputable brand and sized for the maximum continuous current draw of your system (similar to how you would size cables and busbars). If installing a 48V battery bank, you should also consider the max voltage rating of the switch as some are only rated to 32V.
Use appropriate fuses
In most electrical systems, you'll be using a few different types of fuses and its essential to understand the correct fuse to use in each situation. For this guide we are focusing on the main battery fuse (also known as the catastrophic fuse) - this protects the main battery cable from excessive currents but also your entire system from a potentially catastrophic short circuit. Note that while most Battery Management Systems (BMS) provides overcurrent and short circuit protection, this is NOT a substitute for an appropriate fuse and should not be relied upon as your last line of defence.
Lithium batteries have low internal resistance which means the potential short circuit current is higher than it would be with a lead-acid battery - it is possible to see currents in excess of 3000A. When choosing a battery fuse you should therefore consider the continuous ampere, maximum voltage and ALSO the surge interrupt rating.
For 12V and 24V systems, MRBF terminal fuses are usually the easiest, neatest and most cost-effective option as the associated MRBF fuse holder/busbar can be installed directly on the battery terminal. For 48V systems we recommend NH or class-T fuses. Note that MEGA and MIDI fuses are fine for loads and chargers but are not appropriate for use as the main battery fuse (the interrupt rating is not high enough).

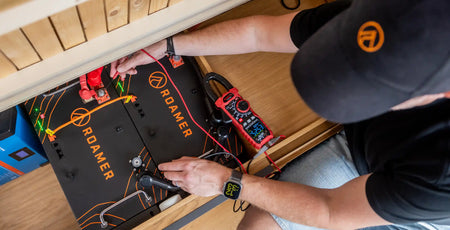
Connect cables
Your battery comes supplied with M8 or M10 stainless steel bolts with captive washer and spring washer. You should terminate your battery cables with copper tube ring terminals. If you are upgrading from an old lead-acid battery it may be necessary to reterminate your cables, we do not recommend using battery post adaptors as these are unsuitable for the high continuous currents that are possible with a Roamer battery.
The cable terminal should be placed flat, directly onto the battery terminal. Nothing should be between the cable terminal and the battery terminal (make sure there are no washers between them!). The bolts should be tightened to a torque setting of 16Nm. Loose connections can introduce contact resistance which will cause the termination to heat up during high current flow.
Roamer do not allow the stacking of multiple high power connections on the battery terminals (maximum of two cable lugs per battery terminal). If you have multiple chargers and other components to connect, then you should use busbars or a distribution system. Too many cable connections on one bolt adds excessive resistance, which under high current flow can become extremely hot. Shifting any complex connection points away from the battery reduces the risk of fire arising from a failed, poor or loose connection.

Tips for installing
We have provided some additional tips below to keep you and your battery safe when installing.


KNOWLEDGE BASE
Search our comprehensive Knowledge Base
We have a wide range of articles to support you with your battery install. Our articles provide information on battery installation, maintenance and aftercare.


Still need help?
If you can’t find the information you need, contact us via phone, chat or email.
REQUEST TECH SUPPORT CALLBACK